
This tutorial will teach you two ways to export stems in FL Studio. Personally, I recommend you export playlist tracks if you’re going to mix yourself or send your stems to a mix engineer. But depending on how you work in FL Studio, you may want to Split Mixer Tracks instead.
Exporting Playlist Tracks
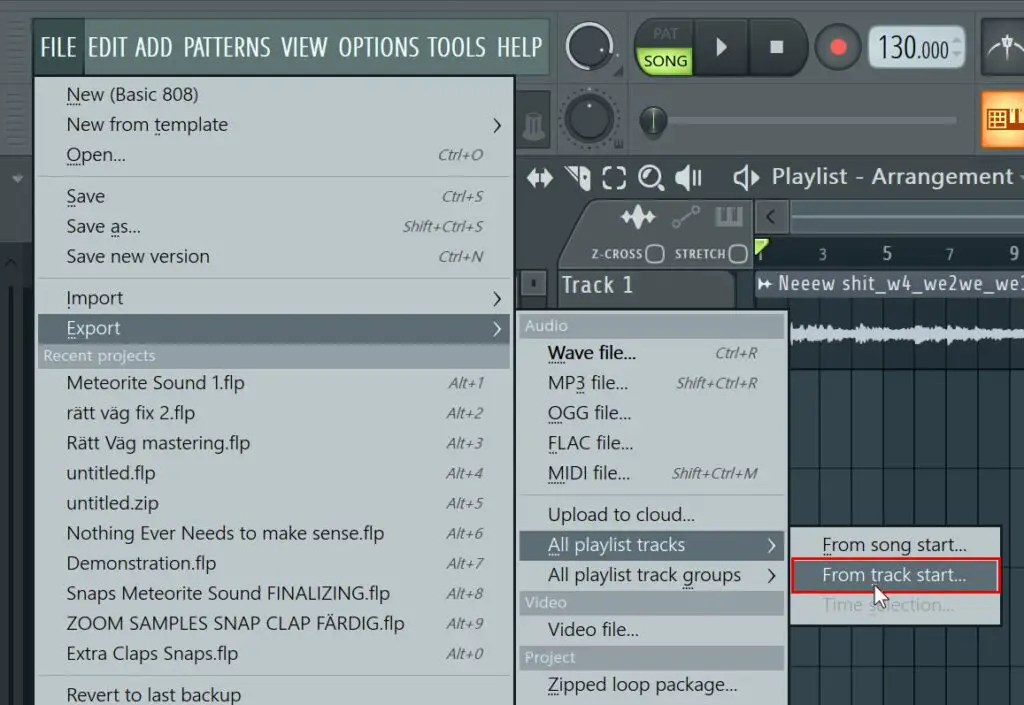
When you export Playlist tracks, you export every track you see in FL Studios’ playlist.
Go to File –> Export –> All Playlist Tracks –> From Track Start. Then choose the location where you want your stems to be saved.
Split Mixer Tracks
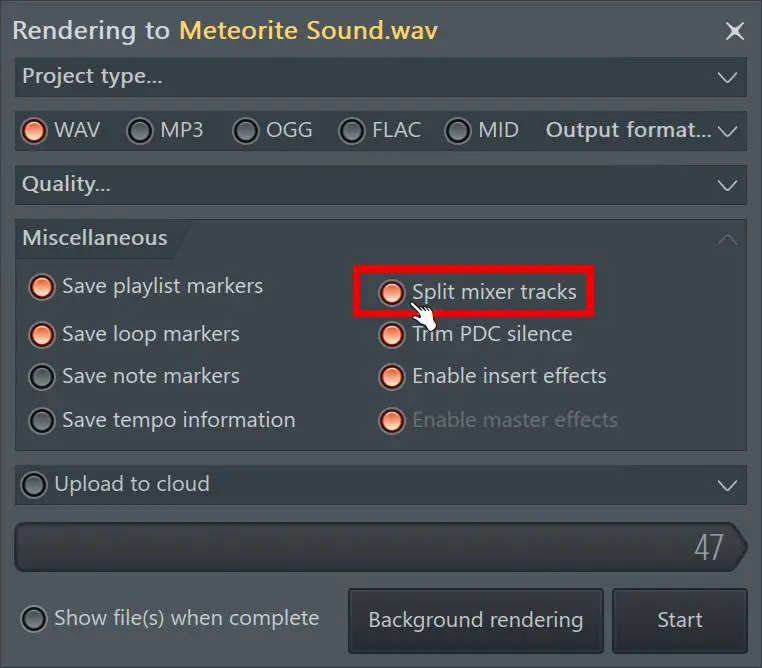
When you export using Split Mixer Tracks you export every Mixer Track. To be clear, the arrangement within the playlist is completely ignored when using this method.
Go to File –> Export –> Wave file. Choose the location you want your stems saved to. And then in the settings windows, choose Split mixer tracks.
Best Settings to Use
If you want detailed knowledge about the settings for exporting in FL Studio, you can go here. But other than that, it’s actually very straightforward. All you need to know is the following.
- When you export as Wav, choose a Bit Depth of 24 or higher.
- When you export as MP3, choose a bitrate of 320kbps
- Change the Tail setting to Cut Remainder


