In this tutorial we’ll go over how to use automation in FL Studio. Automation is a feature that exists in nearly every DAW which lets you change parameters over time such as volume or pitch. To begin automating, you need to create an automation clip.
Step 1. Create an Automation Clip
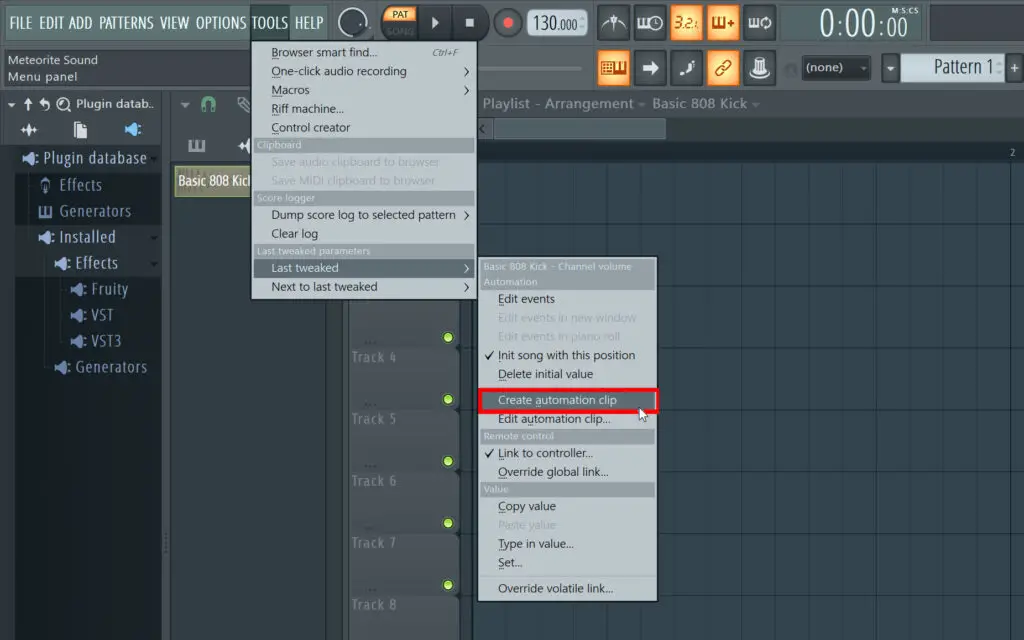
Go to the top left menu, then Tools –> Last Tweaked –> Create Automation clip. This will automatically add an automation clip for the parameter or knob that you last changed within any audio clip or plugin.
There are more ways to create automation clips and you can see them all here.
Additional Ways to Create an Automation Clip
Right-Clicking on a Knob
Right-Clicking on most knobs within FL Studio will give you a drop-down menu in which you can choose ‘Create Automation Clip’
*Not all knobs have a drop-down menu. And for non-native FL Studio plugins, you often need to use the ‘Last Tweaked’ feature.
Audio clip Menu
In the playlist editor, you can also go into an audio clips settings and choose ‘Automate’ to create an automation clip.
Step 2. Create Automation Points
When you’ve created the automation clip, you need to create automation points. You do this by right-clicking within the clip.
Points lower down have lower values, and points higher up have higher values.
If any of this sounds difficult or complicated, it’s really not. And once you’ve learned this, a world of possibilities opens up for you when it comes to creating awesome music, as the automation process works the same for ALL plugins and audio clips.
Automation Tricks and Tips
Here are some tips & tricks for automation in FL Studio.
- Right-Click on an automation point to choose from different geometric waves in the drop-down menu
- Automation clips can be stacked on other audio clips and MIDI patterns
- You can control almost anything, even tempo within FL Studio using automation
- You can create a short automation clip and then use copy+paste to re-use the segment
- Use automation to even out the volume on vocals
Controlling Tension
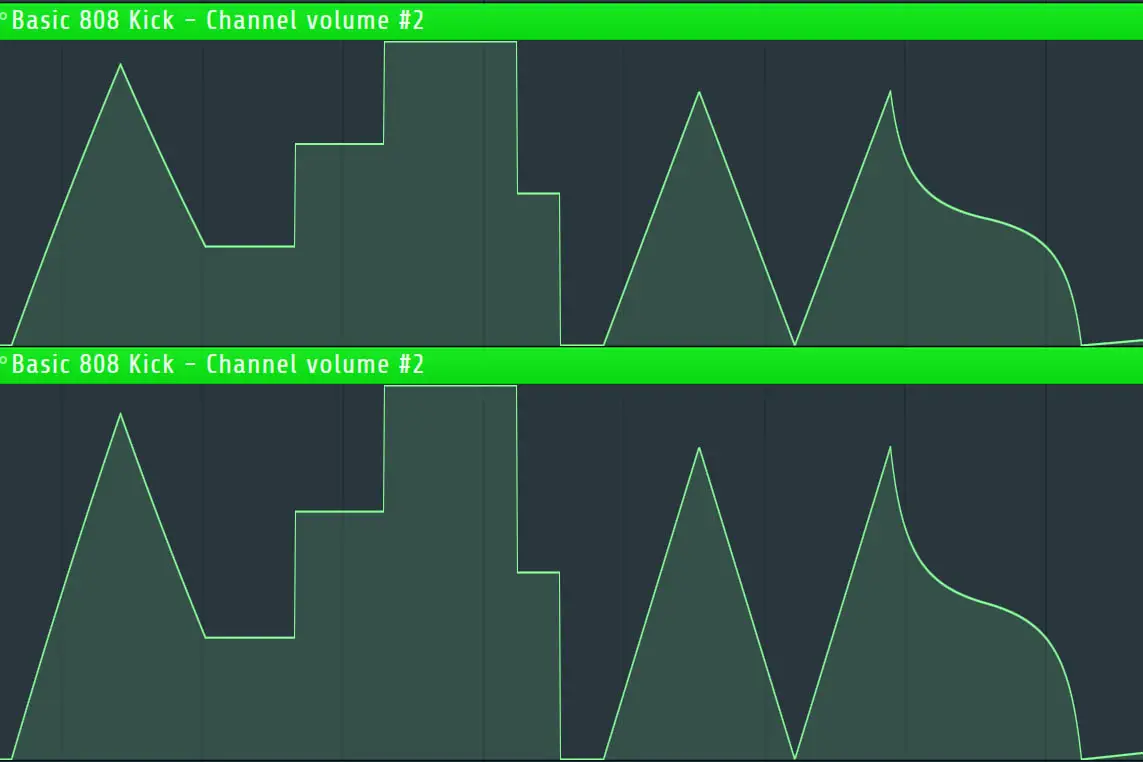
You can control the slope (tension) between points by clicking and dragging on the little circle between two points.
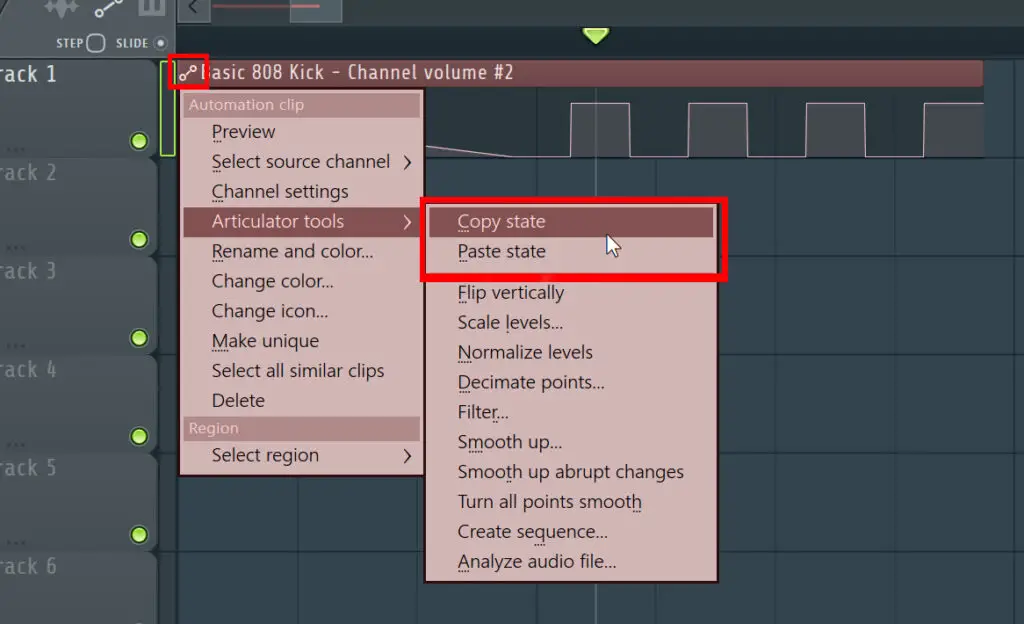
Copying Automation State
Copying Automation State simply means copying all of the parameters of an automation clip to another automation clip. When doing this, simply copy the state from one automation clip, and paste the state into another clip.
Use-Cases for Automation
Just to clarify a few things on how automation is used.
Automation is often used for controlling how much of an effect you apply. For example, you may want a little bit of an effect such as reverb or EQ at the beginning of a track, and more as the track progresses. Automation lets you do this.
Automation is also used to adjust the volume over time for audio clips and instruments. And it can be used to create unique effects by modulating sounds in creative ways.
Really, there could be a whole book or a 3-hour video on how to use automation for various purposes. And I’m confident you don’t need to learn everything about it before you start using it. Just apply what you’ve learned in this tutorial, and you’ll find your own way to use it.
Until next time.


