
If you wanna make cover art on your iPhone, you’ve come to the right place. I’ve experimented with many different apps, and I’ve come to many conclusions. If you want to know about making cover art for music, design philosophy, and what images to use. Check out my cover art guide. Anyways, let’s make some album art on your iPhone!
- Get a good image by taking a photo with your phone or downloading one from a free image library. Make sure the Image license allows for commercial use. Save the image to your files or photos app.
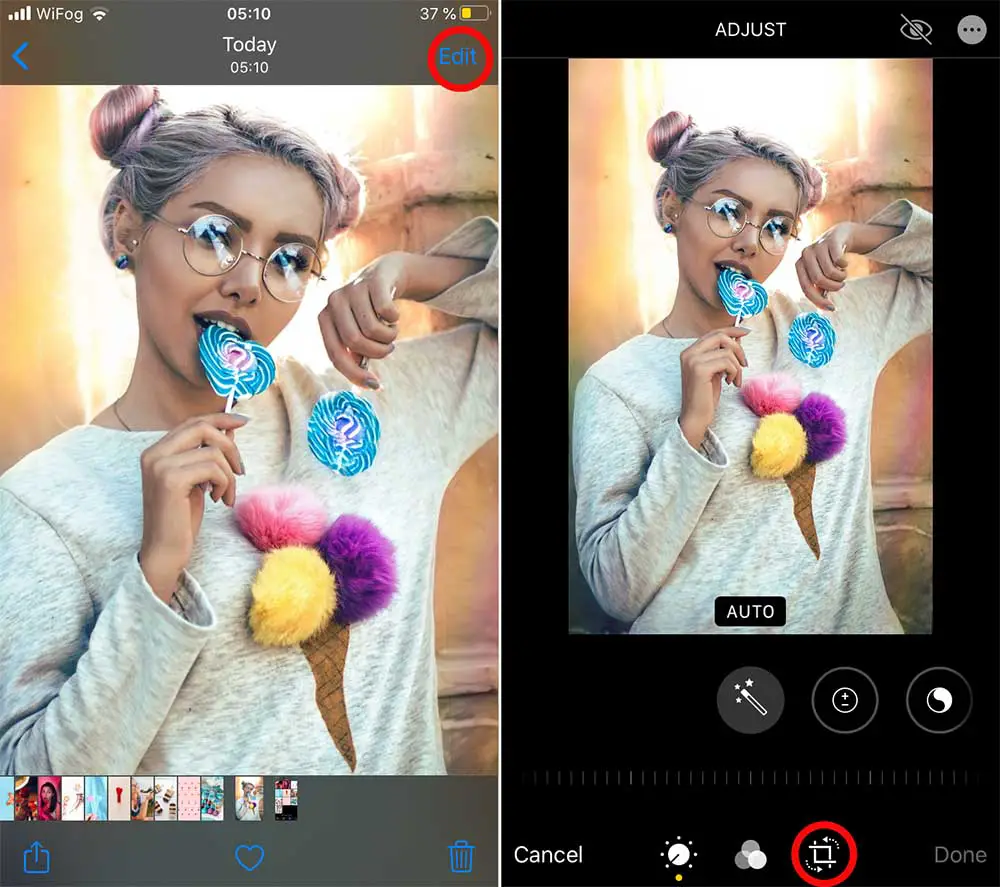
- Open the image up, and click edit in the top right corner.
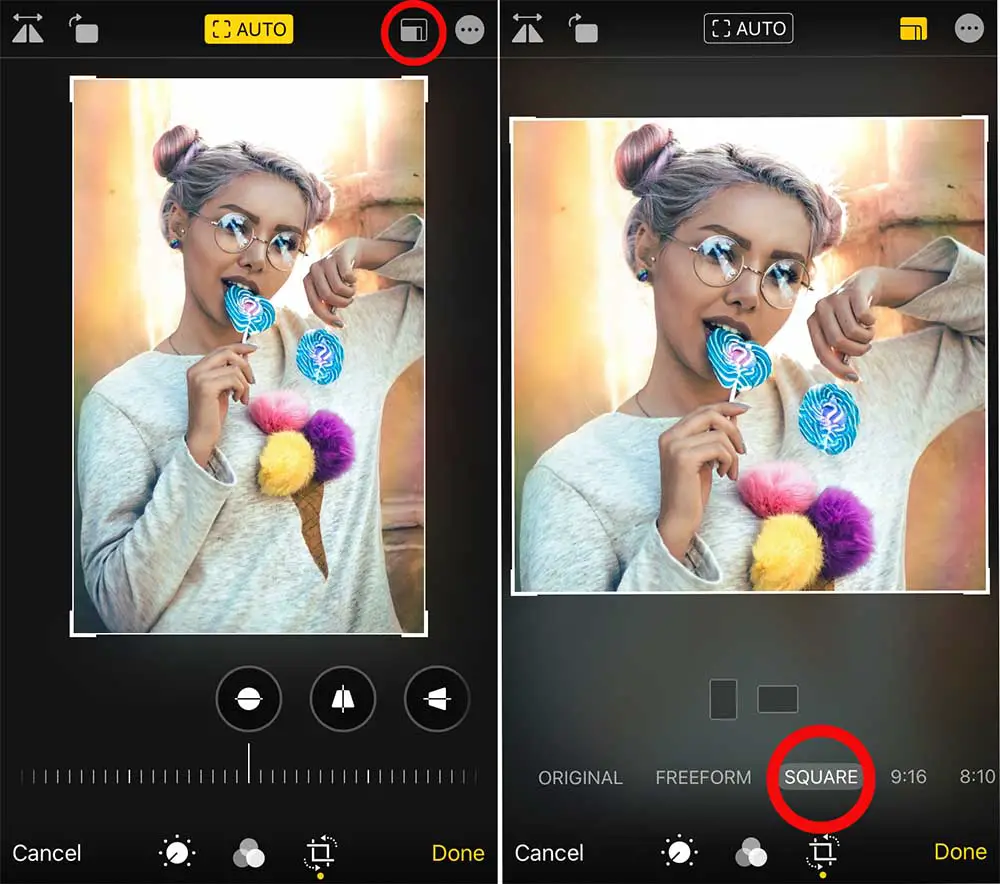
- Tap crop and choose “square” to crop your image down to the cover art format, then tap “done”.
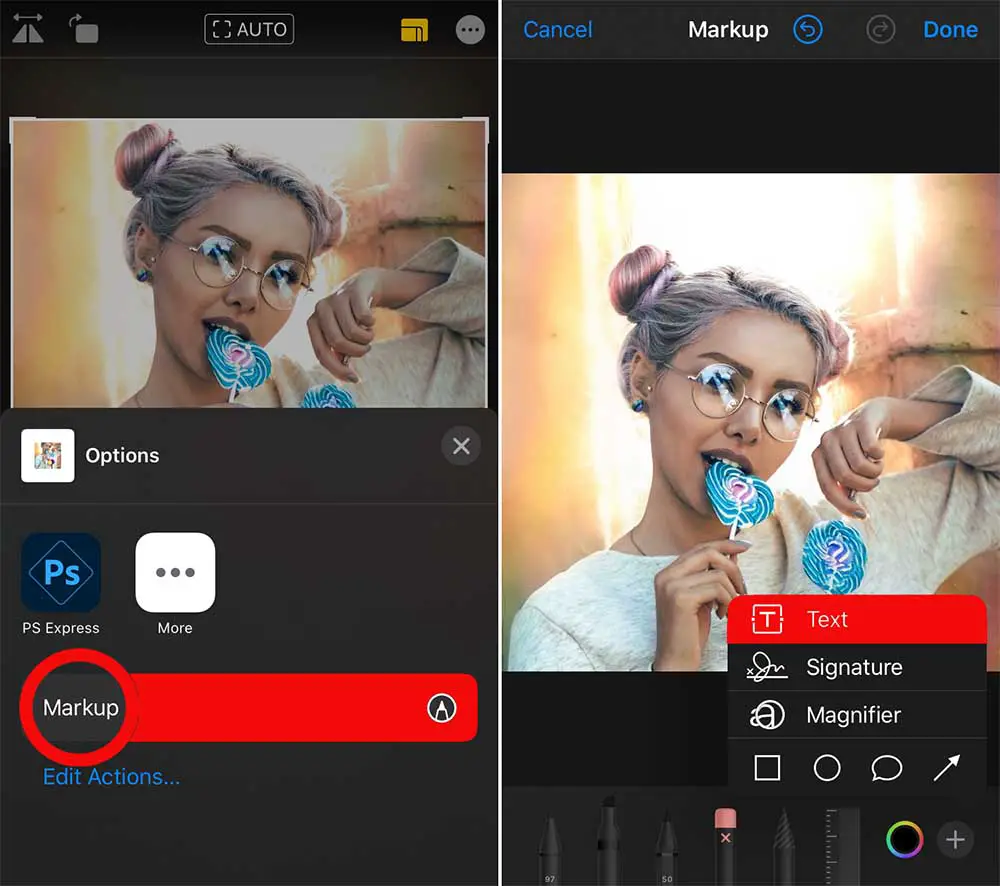
- If you need any text, use iPhone’s markup tool. You’ll find it in the editor.
- Now you have cover art for your music. Save the image and upload it to the streaminzg services.
Let’s get that in more detail. Follow this awesome step-by-step guide. Where I’ll give you two ways to make cover art. The first one is by using iPhones native photo application, and the second one is by using Photoshop mix. For both methods we’ll need some images, so let’s begin by downloading some.
Start By Getting Images For Your Cover Art
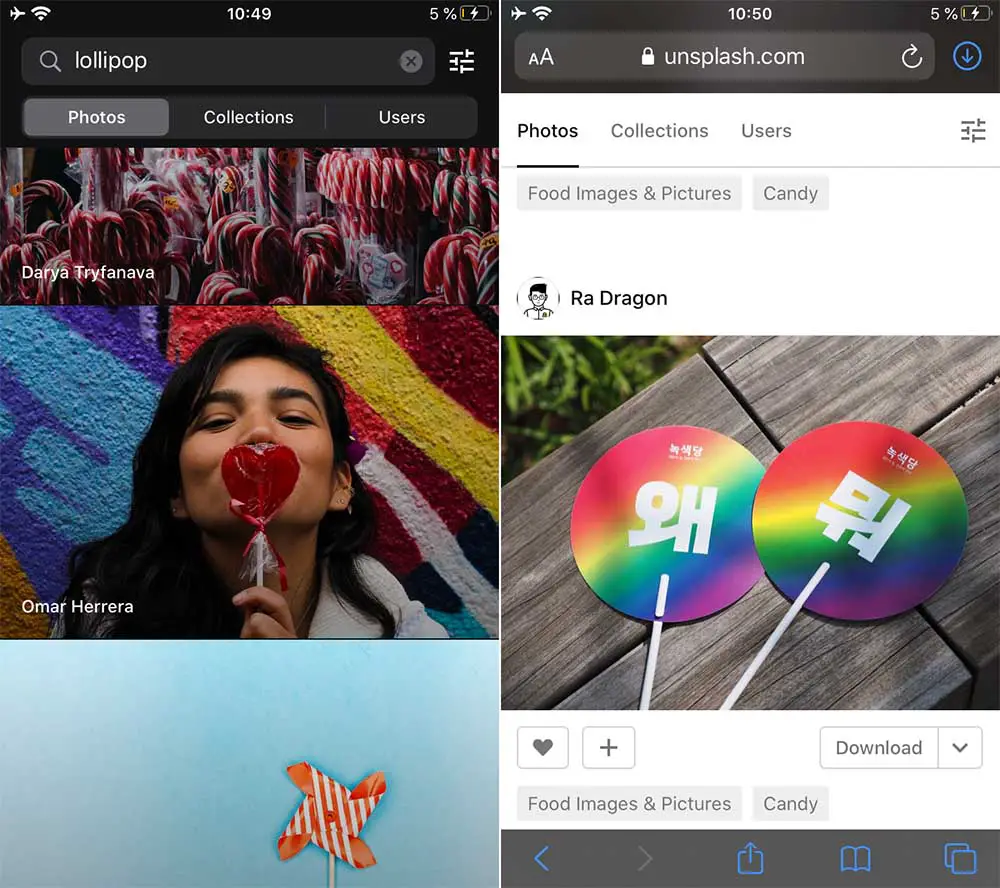
There are many sites from where you can download images. I mostly use Unsplash or Pixabay, they are two sites where you can download free images for commercial usage. They are the perfect places to find images that you can use for your cover art! In this tutorial, we’ll be using Unsplash.
Naturally, you could just take a photo with your phone and use that! If you already have a photo, you can skip this step!
Download the Unsplash app or go to Unsplash.com. Find an image you like, click it, and hit download. If you’re using the website, click on any image you like. Click download –> Original Size –> View. Tap and hold on the image, and “add to photos”
If you want to access an even bigger image library, I suggest you go to Istockphotos. There are many paid libraries, so if you’re willing to spend a few bucks, your options are unlimited.
Making The Cover Art
Let’s get going. We’ll begin by using the iPhones built-in photo editor. You have an image and now you need to first resize it to fit the album cover art format, and afterward, you might want to add effects, text, or filters.
- Open the image up in your photo library. Then hit the resize icon.
2. Tap on the format icon and then choose square in the format options. Crop the image and choose which part you wanna use for your cover art.
3. Now that you have cropped and formated your image, you can add text if you want to. Tap markup and then text. You may want to add your artist name, the name of the song, or the name of the album.
4. Our cover art is finished and it’s ready to be uploaded, yeehaw!

Cover Art Layering With Photoshop Mix

So I taught you one quick way to use iPhones native image editing app to make cover art. Let’s get down to business with the second and more advanced way. For this cover art, I’ll be combining two images into one using layers. Layering is a core component in photo editing, and the technique really opens up a lot of possibilities.
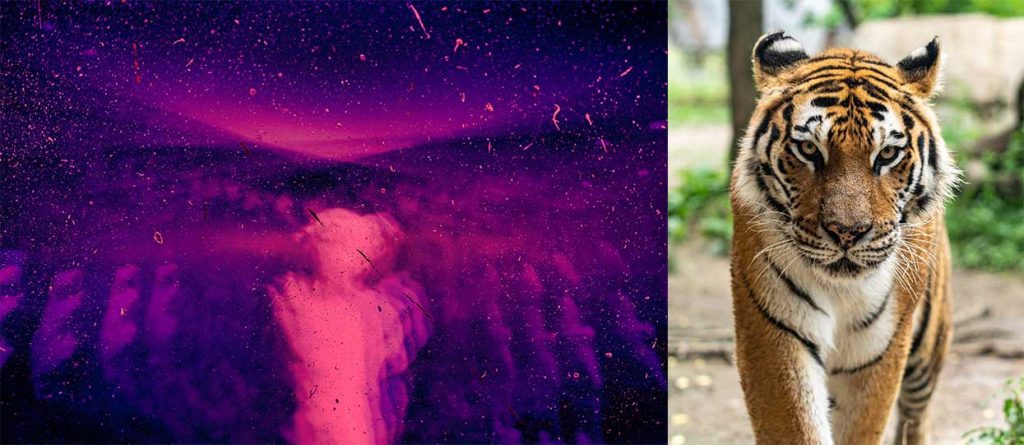
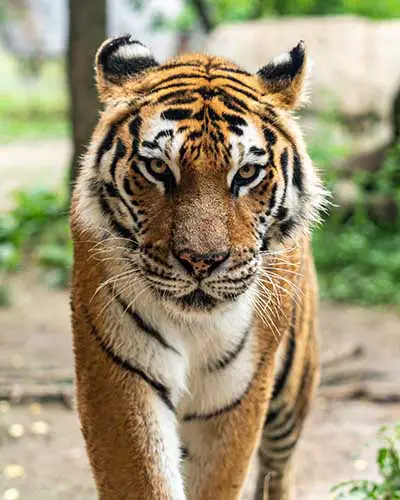
- I start out in the Unsplash App and I find two images that I think will combine really well.
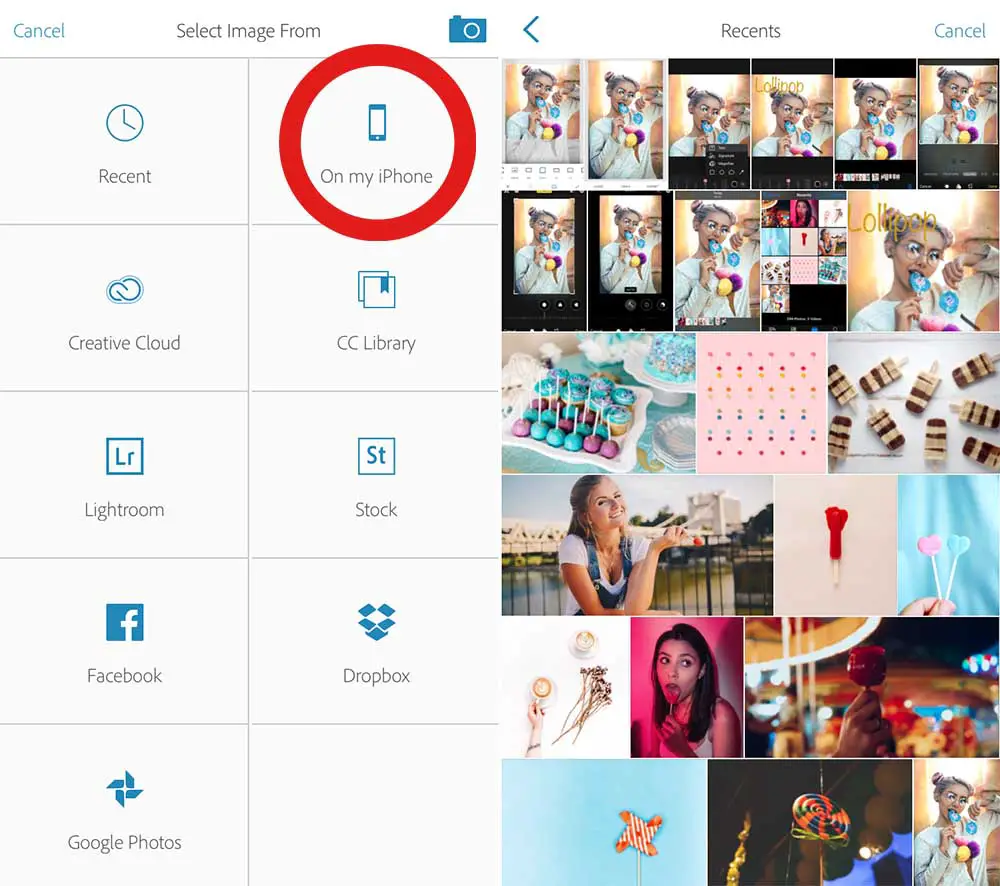
2. After downloading the images. I go into Photoshop Mix, tap the + sign to create a new project, and select an image from my iPhone.
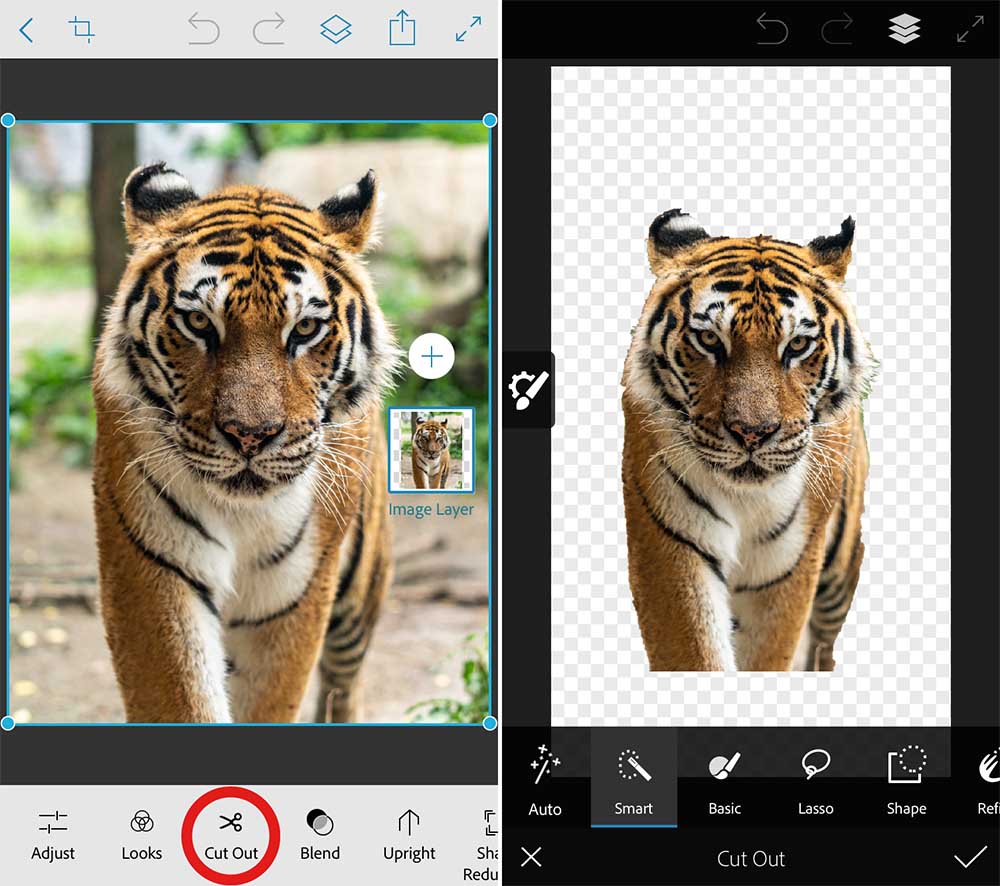
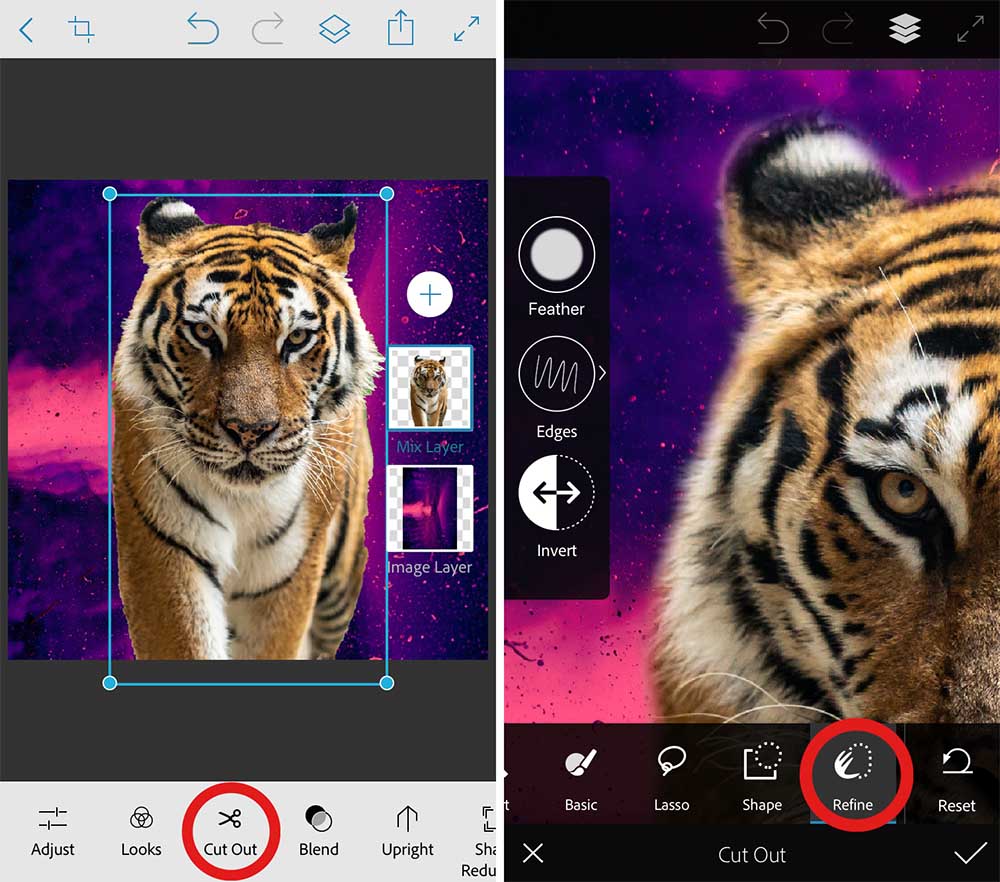
3. In the Photoshop Mix app, I press Cut Out and begin to remove the background layer in a very crude and quick way. In this case, the auto function worked really well, so I didn’t even have to spend a lot of time removing it. Usually, I use a combination of Smart and basic tools, as they are great for precision work.
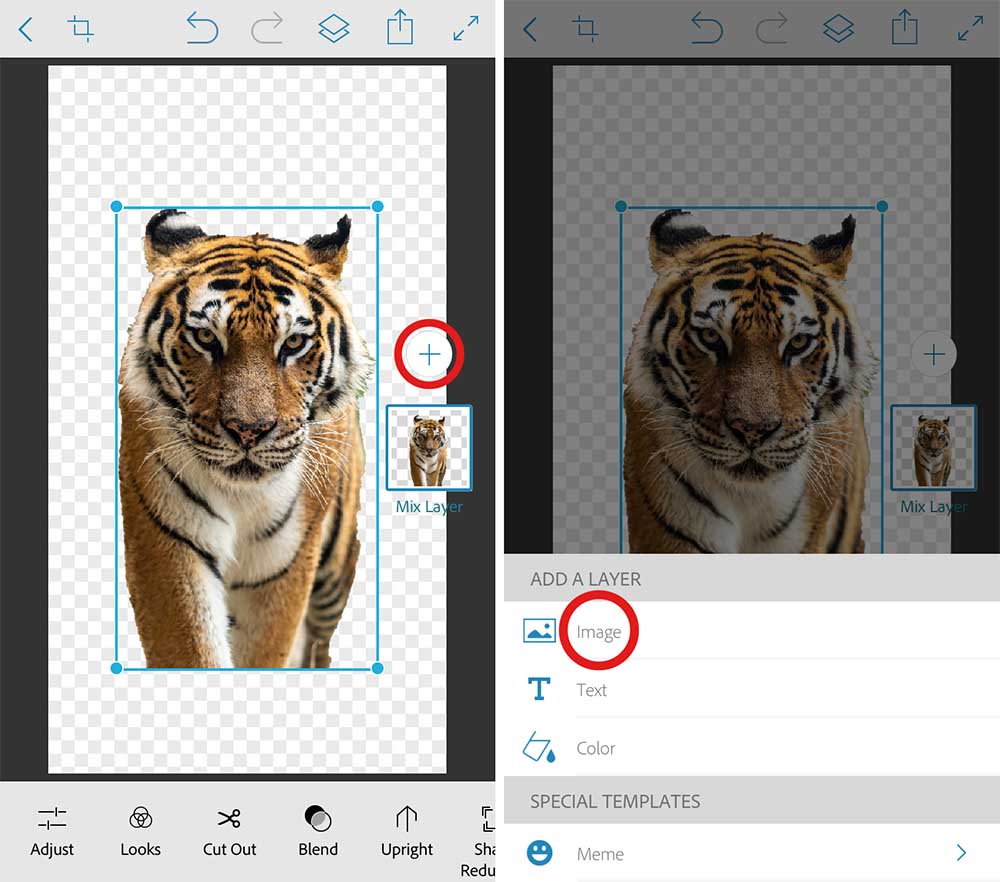
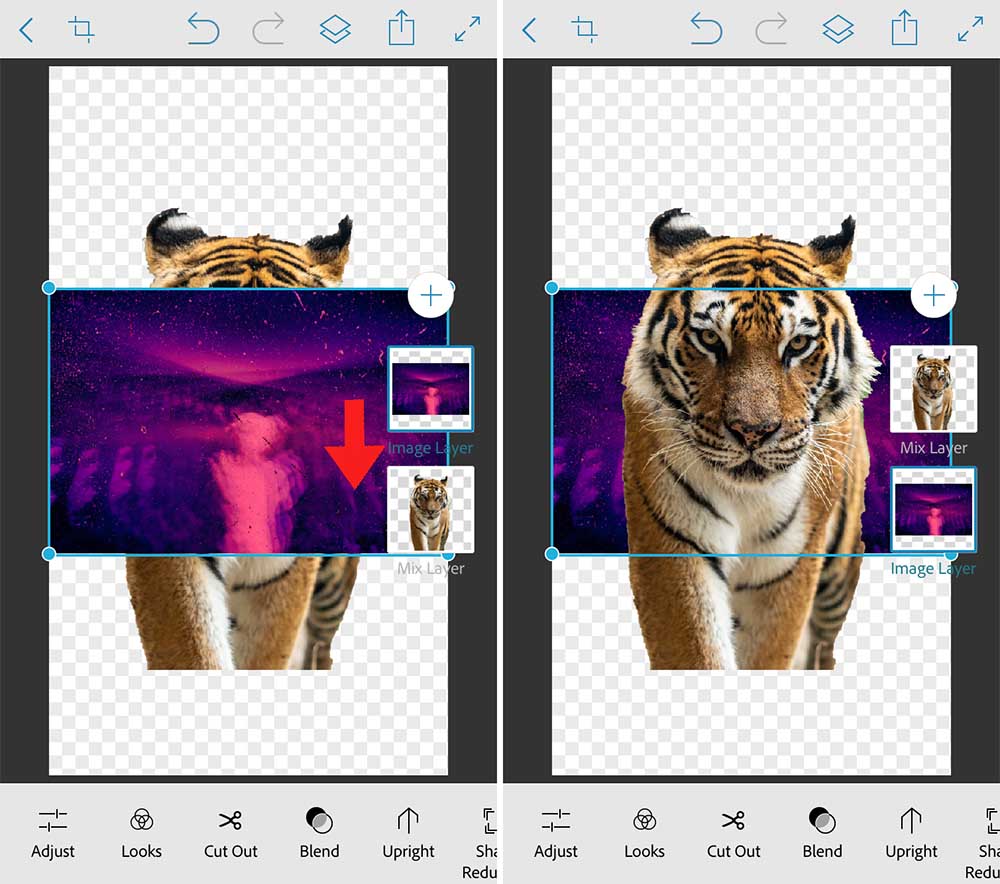
4. Now I got the lion crudely cut out, and so it’s time to add another layer for the new background. I tap the +, and select image under “Add a layer”
5. The new layer will automatically land on top of my first layer, so I tap and hold on the layer to drag it down and place it under my first layer. The layers always work so, that the bottom layer will be in the background of any layer above it.
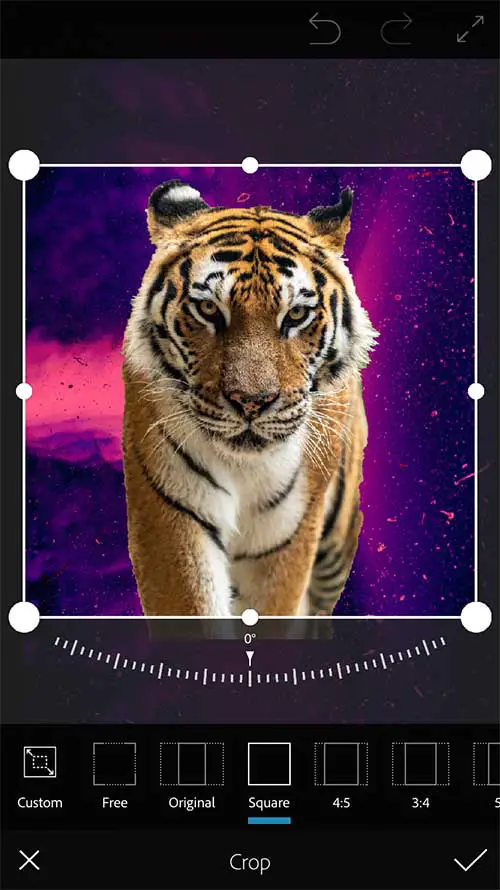
6. Now It’s time to crop the image into the album cover art format, which is a simple square. I go into the crop options and select “square”.
7. Now I got the background in place and I can start seeing what the final image will look like. I begin to refine the tiger. Because it’s a tiger, it has a lot of furs, and to preserve the fur, I use the refine tool. I tap and hold on to the feather to increase or decrease the effect. I get a good result and I tap the checkmark.
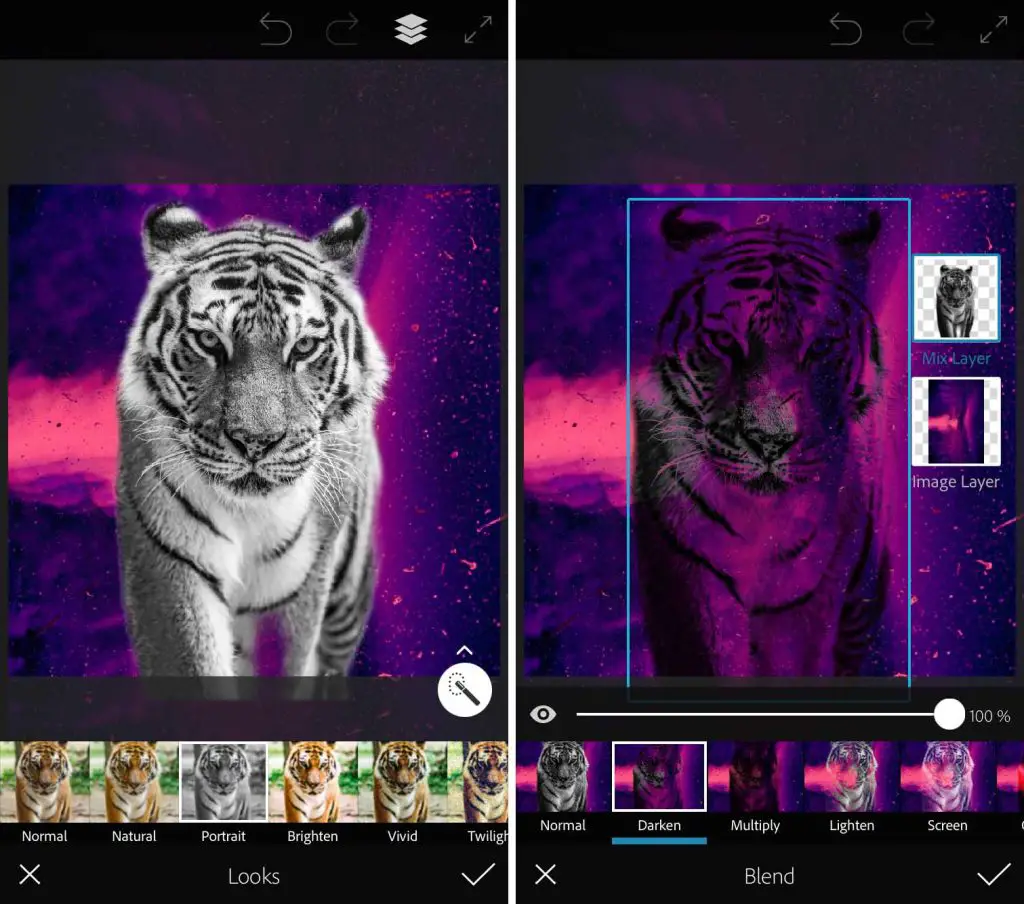
8. I thought it would look really cool to blend the tiger in with the background. So I first select a black and white filter and then go into blend options and select darken. By selecting the black and white filter before blending, I get a very transparent outlining of the tiger as mostly the black parts are preserved.
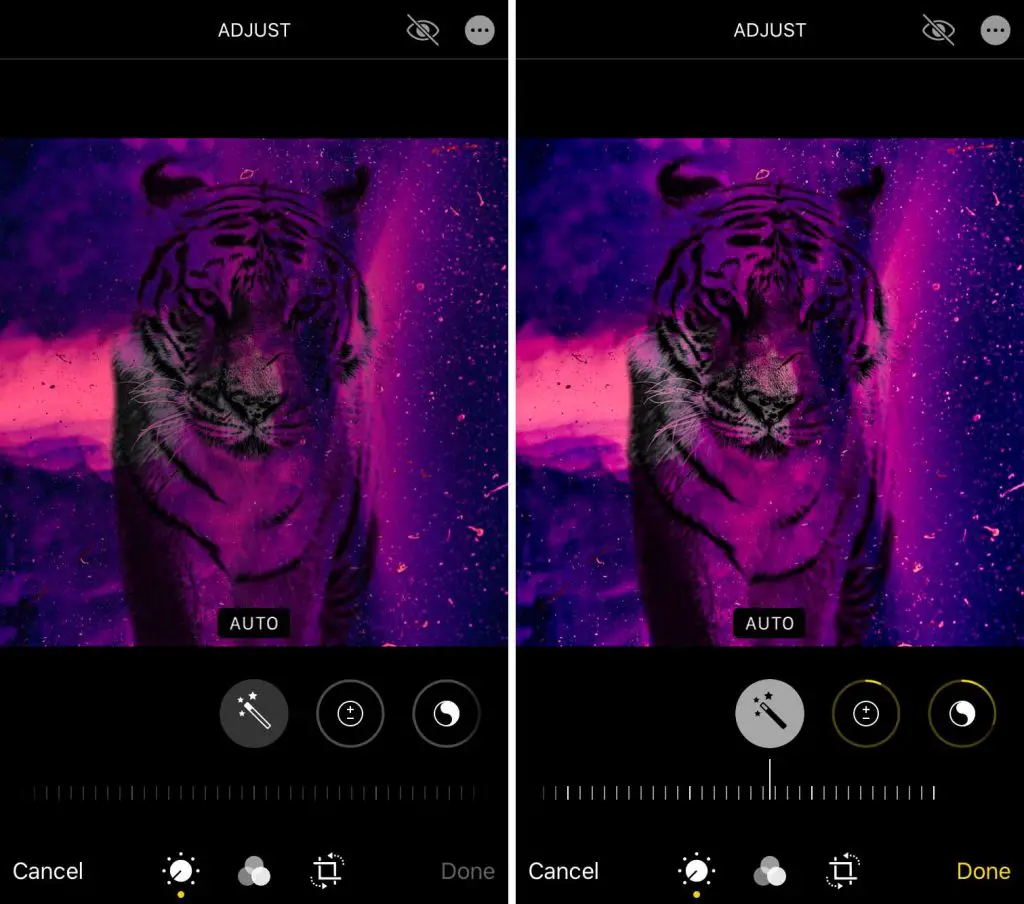
9. I save the image to my camera roll. It all looks really good, but it’s too dark! So I open it with the iPhone photo editor and press the magic wand button “auto”. This makes the image pop a bit more.
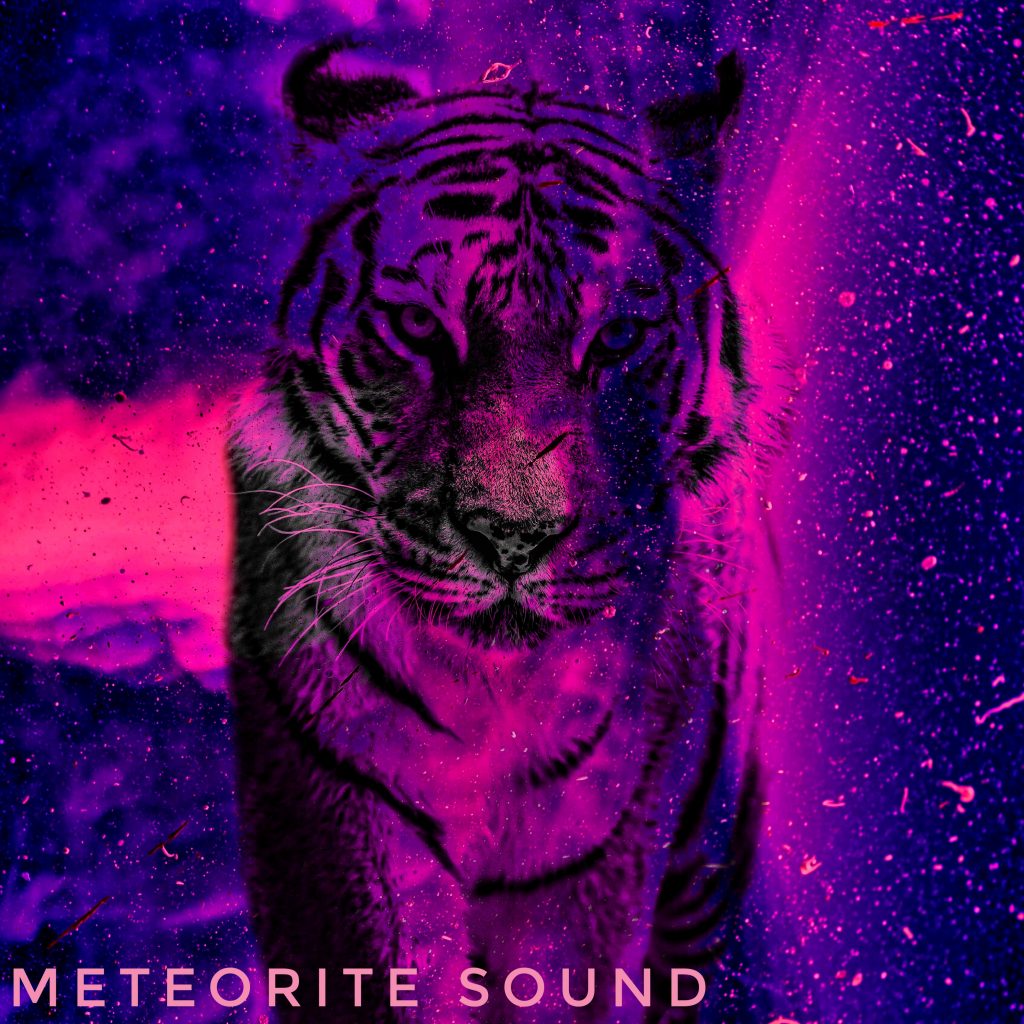
10. The image still needed a little bit more lifting, so I open it in Snapseed and put the “accentuate” filter on it. Thereafter I add some text, also using Snapseed. I color the text according to the color palette of the image.

11. Finished result. As you can see, the two images create an absolutely awesome album cover art. I think it has a certain magical quality. I’ll call the artwork “Void Tiger”!

Combine iPhone Apps To Create The Best Cover Art

I really believe in combining different apps to get the best results! I feel like there is an app for every purpose, and Photoshop mix is great for layering, but it doesn’t even have an option to add text, which is why another app might be necessary. Neither does it have advanced color balancing options.
That’s why I turn to other apps to finish the job, Snapseed, and iPhones, built-in image editor. You can download an app for every purpose such as fonts, layering, photography, editing, recoloring, etc.
I found some apps that were extremely useful for making cover art. Here are just a few links to them in AppStore.
Snapseed, Unsplash, Photoshop Mix, and Phonto are my favorites. Phonto is for adding fonts, Photoshop Mix is for layering, Unsplash is for getting pictures and Snapseed is great for filters and advanced editing.
Resolution

If you want to create cover art for digital distribution, go with a resolution of 3000×3000 pixels. Some distributors will let you get away with less such as 1000×1000 however. When music is played within apps such as Apple Music or Spotify, only a thumbnail is shown. So it’s not very important to have a high resolution.
Some thoughts.
To get great results when you’re making cover art on your phone. The trick to getting good results is using great images. That just speeds up the entire process, and you won’t have to edit as much. While the screen size is small, many image editing apps are created to provide maximum usefulness in a small format.
I think creating cover art on iPhone is a super good idea, and few think it’s possible. But it absolutely is!
Thanks for reading my tutorial. If you wanna check out the cover artworks that I got for sale, click here, and if you wanna know more about making cover art in general, go to my full guide!


